TRANSFERRING PRINTED IMAGES TO ARTWORK
Decoupage
APPLICATIONS & TECHNIQUES
This process allows artists to transfer black & white and colored images generated from magazines, newspapers, photographs and laser printers onto any surface that will accept acrylic paint. It can be done with a number of Liquitex Mediums depending upon desired effect.
The medium is brush, poured or troweled over the image to be transferred. After the medium has dried, it is soaked in water and the paper is removed from the back of the image. You are left with a transparent to translucent image that is imbedded within acrylic medium.
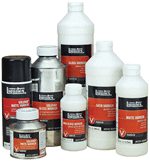
Using Liquitex Gloss Medium & Varnish
Directions: - Selecting The Image
Select image of your choice: newspaper, magazine, photograph or computer laser print (not ink jet). Some images such as newspaper, laser print, some magazine photos will transfer directly without the need of a Xerox. Some images such as photographs and coated magazine images will not transfer.
Obtain a Xerox of your selected image either in black & white or color. Since it can be unclear beforehand which image will and will not transfer, a Xerox of the original image is recommended.
Preparing Image for Transfer
- Place copy image side down onto scrap paper and spray back of image with a coat of a spray adhesive. Use proper ventilation and facemask.
- Position copy, image side up onto glass palette and press flat. Image may be taped to glass palette instead of using spray adhesive, however a taped image will not lay flat once coating is begun.
Coating Image
- Brushing Method: Using a 1/2"-2" wide, soft brush, coat image with Liquitex Gloss Medium & Varnish. For minimal brush marks, thin with 5-10% Liquitex Flow-Aid Water mixture (1 part Flow-Aid to 20 parts water).
- Allow to dry 20 minutes to one hour, depending upon environment. While wet, medium will appear slightly cloudy. When dry, medium will be completely clear. A hair dryer will speed the process.
- Repeat steps #1 & #2 until the Gloss Medium & Varnish coating is thick enough so that you can peel it off the glass without tearing; 5-12 coats will give you a thickness of 1/1 6"-l /8". Coat successive layers in different directions, horizontal then vertical then horizontal, etc. The thickness of the coating can vary according to your desired effect. Thin layers, about 1/1 6, may be difficult to handle.
- Pouring Method: Use a carpenters level to make sure the glass palette surface is level. If surface is not level poured acrylic medium will run toward lower edge and when dry will be thicker at that edge.
- Tape around image with masking tape in 4-5 successive layers so that a ridge is built up around image. You are building a dam to contain the poured acrylic medium.
- Pour Liquitex Gloss Medium & Varnish over image. Spread around with soft brush if need be, while wet.
- Allow to dry completely: 48-72 hours. When medium is completely clear, it is dry.
Soaking Transfer
- Cut around dam and remove image from glass palette. Submerge in lukewarm water and soak 10-1 5 minutes. The longer the image is submerged in water the easier it will be to remove the paper from the back of image. Do not soak paper longer than 20 minutes. When submerged in water the clear medium may turn slightly milky.
- Remove image from water and using your fingers, gently rub off paper from back of image. Rub off top layer of paper only and submerge image into container of warm water. Repeat steps until only the image remains.
Drying Transferred Image
- Blot with paper or cloth towel. Place flat between layers of wax paper, then paper towel.
- Weight top and allow to dry, insuring the image dries flat.
Adhering Transfer to Support
- Remove when dry (24-48 hours). Select support that transfer is to be adhered to.
- Coat the side of the transfer that is to be affixed to the support with either Liquitex Gloss Medium & Varnish or Gel Medium. Quickly position the transfer onto the support (i.e. canvas) and press.
- To insure uniform contact, dry transfer under weight. Cover with a sheet of wax paper to prevent transfer from sticking to weight. Let dry 24 - 48 hours.
Directions: Using Liquitex Interference Colors
- Follow directions for "Selecting Image" and "Preparing Image for Transfe'.
- Mix 5-10% Liquitex (D Medium Viscosity Interference Color of your choice into Gloss Medium & Varnish to produce an interference film.
- Follow directions for "Coating Image: brushing or pouring methods".
- Follow directions for "Soaking Image", "Drying Transferred Image" and "Adhering Transfer to Support".
- Interference Color Transfer will be opalescent.
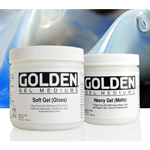
Directions: Using Liquitex Gel Medium
- Follow directions for "Selecting Image" and "Preparing Image for Transfer".
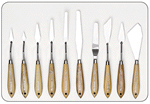
- Coating Image: Using a palette knife, apply 12 coats of Liquitex Gel Medium or Heavy Gel Medium.
- Apply each coat 1/16" - 1/8" thick. If applying two coats, allow first coat to thoroughly dry before applying second coat (approximately 24-48 hours). The thicker the Gel or Heavy Gel Medium coating the more opaque the final transfer film will be.
- Follow directions for "Soaking Image", "Drying Transferred Image" and "Adhering Transfer to Support".
- A translucent to translucent/opaque film transfer will result.
Directions: Using Liquitex Texture Gel Mediums
- Follow directions for "Selecting Image" and "Preparing Image for Transfer".
- Coating Image: Using a palette knife, apply 12 coats of Liquitex Natural Sand, Resin Sand or Glass Beads Texture Gel Mediums. Apply each coat 1/1 6" - 1/8" thick. If applying two coats, allow first coat to thoroughly dry before applying second coat (approximately 24-48 hours). The thicker the Texture Gel Medium coating the more opaque the final transfer film will be.
- Follow directions for "Soaking Image", "Drying Transferred Image" and "Adhering Transfer to Support".
- A semi-transparent, textured film transfer will result.
Using Liquitex Gloss Medium & Varnish and Texture Gel Medium
- Follow directions for "Selecting Image" and "Preparing Image for Transfer".
- Using a soft brush or palette knife mix 5-50% Natural Sand, Resin Sand, Glass Beads or Black Lava Texture Gel Mediums into Gloss Medium & Varnish. The greater the percentage of Gloss Medium & Varnish, the more transparent and less textured the final transfer film will be. For example, a Black Lava Texture Gel/Gloss Medium & Varnish mixture will result in a transfer that is transparent with black speckles. The amount of transparency and black speckles will be influenced by the ratio of Gloss Medium & Varnish to Black Lava. More GM&V, less Black Lava = more transparency/less black speckles.
- Follow directions for "Coating Image: brushing or pouring methods".
- Follow directions for "Soaking Image", "Drying Transferred Image" and "Adhering Transfer to Support".
- A transparent-translucent textured film transfer will result.


