MARBLING
APPLICATIONS & TECHNIQUES
Marbling is a single print process, done by manipulating paint that is floated on the surface of a thickened water solution. The floating paint is then transferred from the water onto paper, fabric or any other porous surface.
MATERIALS NEEDED
- Liquitex Medium Viscosity Concentrated Artist Colors: They are recommended for marbling, as they are fluid and easily mix with water. All colors can be intermixed. The following colors have been found to work consistently: Burnt Sienna, Brilliant Yellow, Permanent Alizarine Crimson Hue, Phthalo Green, Ultramarine Blue, Titanium White, Dioxazine Purple, Prism Violet, Phthalo Blue, Cerulean Blue Hue, Turquoise Green, Bright Aqua Green, Permanent Green Deep, Chromium Oxide Green, Bright Yellow Green, Yellow Medium, Azo, Yellow Orange, Azo, Yellow Light Hansa, Yellow Oxide; Deep Magenta and Red Oxide. Other Liquitex Acrylic Colors in tubes or jars work with varying degrees of success.
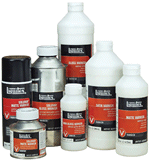
- Liquitex Marble Ease: A medium that enables all Medium Viscosity Colors to spread rather than pool on the size surface.
- Size: A suspension mixture, which the paint floats on. Traditionally tragacanth or carrageenan, are added to water to thicken it. Blue Liquid starch or powdered laundry starch can also be used. Not all brands of liquid starch work.
- Mordant: Prepares the surface of paper or fabric for quick adhesion of the paint.
- Paper or Fabric: All paper, fabric and leather should be absorbent without sizing. Natural fibers and synthetics can be used. Wash if cloth is new, has been starched or sized. Remove wax and oils from leather with acetone.
EQUIPMENT NEEDED
- Containers and stirrers for paint.
- Stylus, pin, needle or pointed tool.
- Combs with long prongs. Purchase or make by pushing T pins into a 1 " wide strip of corrugated cardboard and taping over their tops. The teeth should be evenly spaced and long enough to pierce the surface of the paint floating on the size. 4. Whisks for Spattering Paint: Secure a rubber band to one end of a bundle of broom bristles.
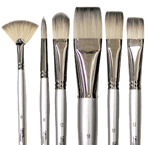
- Eye Droppers or Brushes: One for each color used.
- Pans: Cake pans, aluminum roasting pans or photographic trays that are 1-2" deep.
- Newspaper Strips cut 2" wide for skimming excess paint from the size after marbling.
- Wastebaskets next to the marbling area.
- Paper Towels for clean up.
PREPARING SIZE AND MORDANT
Starch: Use Blue Liquid starch or powdered laundry starch mixed to heavy recipe on box.
Carrageenan Moss: (carragheen) found in art stores and mail order. Add 2-3 oz. moss (approx. 1/3 cup) to 3 quarts distilled water. First mix moss with 1 pint water in blender. Add this mixture to rest of 3 quarts and stir. Let stand 15-30 minutes. Pour into pan and leave for 30 minutes until bubbles disappear. If colors sink into size add a few drops of ox gall.
Irish Moss Tea: Available in health food stores. Two ways to prepare mixture:
- Add 1 cup dried whole or 1 oz. ground moss to 2 quarts boiling water and cook 5 minutes. Stir constantly. Remove from heat and add 2 cups of cold water. Cover and set aside over night. Size must be room temperature for use.
- Fill large pan (spaghetti cooker) with water and sprinkle moss on top until the surface is entirely covered. Bring to a boil and let cool overnight.
Gum Tragacanth: Available from art stores and mail order. Two ways to prepare mixture:
- Mix one tablespoon gum tragacanth with one quart hot (not boiling) distilled water. A blender or mixer will speed up the mixing process. Let stand 24 hours. If air bubbles rise, wipe off with the edge of a strip of newspaper. Add another quart of water when ready to marble.
- Fill an 8" x 1 0" x 2" deep pan with hot water. Sprinkle gum powder on top so that a fine layer covers surface (1 tsp. to 1-2 pints of water). Mix until powder is dissolved, repeat twice more. NOTE: Gum tragacanth doesn't sour as Carrageenan does. Starch keeps for long periods.
MORDANT
- Mix two tablespoons alum with one pint of hot, distilled or soft water. Alum is available in grocery stores and some art stores.
- Mark one side of the paper or fabric. Turn over and sponge the cooled alum solution on the other unmarked side. The paper should be kept damp but not wet, although the fabric can be dry before printing. Construction paper doesn't need this treatment but all fabric does.
MIXING ACRYLIC PAINT WITH MARBLE
EASE MARBLING FLUID
- Mix Medium Viscosity Concentrated Artist Colors with Marble Ease and a small amount of distilled water, to the consistency of light cream. If paint is too thick it will sink; if too thin it will spread out quickly and become transparent.
- Marble Ease should be added directly to the paint. Start with a 50/50 mixture - if colors spread add more paint; if they sink, add more Marble Ease or water.
MARBLING DIRECTIONS
- Treat fabric with mordant solution and allow to dry. If needed, treat paper with mordant and keep damp. Do not allow treated paper to dry.
- Fill pan with size, so it can be pierced with stylus or teeth of comb (1 /2" to 1 " deep).
- Skim size with newspaper to reduce surface tension and eliminate dust and bubbles.
- Spatter or drop several previously thinned colors onto the surface of the size. Manipulate colors with the stylus or combs to form patterns or pictures.
- Gently lay the mordant-treated paper or fabric, treated side down, on top of solution. Let middle touch first. When ends start to curl up, lift off and let the excess size drip back into the pan. It will look like paint is dripping but the pattern is in the paper or fabric.
- Blot with tissues or rinse gently with water. Wait until sheet is dry to rinse if using unmordanted paper
- In warm area, drip dry piece on clothesline or air dry, printed side up, on newspaper.
- Clean the size by skimming with newspaper strips before adding new paint and printing another. Old paint will sink to the bottom of the pan.
- The size can be re-used for about a week. Cover or refrigerate to keep. Size deteriorates faster in warm weather. Starch can last for months.
- Marble in cool, low moisture environments for best results.
POSSIBLE PATTERNS
Marble-like: drop paint, then create lines with a stylus.
Bull's-eye: drop paint, one color on top of another consecutively. Some colors work, others don't. Varying the order in which the colors are dropped may affect how they expand.
Hearts: drop color to form bullseyes, then draw the stylus down the middle of the drop.
Flowers: drop color and draw stylus towards the middle of the drop.
Stars: drop color and draw stylus out from the middle of the drop.
Splatters: load a paintbrush, toothbrush or whisk with paint and tap on the edge of the pan.
Flames: splatter colors and comb from one side to other several times in same direction.
Arches or Scallops: splatter colors and comb from one side to other, then top to bottom.
Feathers: splatter colors and comb in one direction. Using a stylus trace a line from top to bottom and back throughout the pan.
Paint can also be splattered or dropped and swirled with a stylus. Many variations are possible. Size should always be still. Abrupt movements disturb the patterns and form bubbles in the size.


